So yesterday my middle child announced that his pencil case was broken… ie… He snipped it with his scissors and didn’t want me to know!
Anyway… I have no way to get out to buy one and I’m wary of the same thing happening again! So I decided to have a go at making one!
I used:
1 A4 sheet of coloured felt
Some embroidery thread
One button
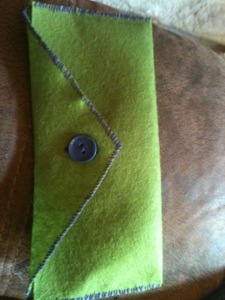
D picked all the colours for the materials and he picked a button to use. You don’t have to sew the edges as felt doesn’t fray, but we wanted the extra colour.
And that was it!
One simple envelope pencil case, that will hopefully last longer than the one I bought him!
Here is how I did it:
Fold the A4 Sheet of felt into thirds.
Sew two of the thirds together (using the embroidery thread) up the sides.
Cut the triangle out the the remaining third and sew the edges. In hindsight I cut the triangle too sharply and would leave about 1cm of rectangle overlap to make sure all his pencils stayed in! (I ended up sewing the edges of my triangle to the body of the pencil case!)
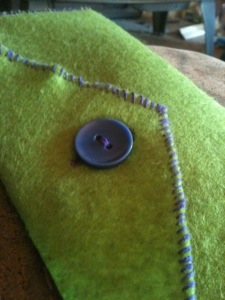
Sew the button onto the main body of the pencil case and then make a button hole in the triangle. You will have to sew around the edge of the button hole as the weight of items in the finished pencil case adds strain, so it needs the extra help to keep form 🙂
Et Voila!
44.763878
0.286031


